Issues Related to GPDS
This topic provides troubleshooting information related specifically to GPDS issues, including:
-
Long Delay Before Galileo Print Manager.net Prints an Issued Document
-
Connection to NPG (docnotify.galileo.com) Is Being Dropped by My Network
Losing Tickets When Errors Occur During Printing for GPDS
The Galileo Print Delivery System (GPDS) enables third-party systems (such as rail vendors) to deliver print documents through Galileo to agencies for processing. When an agency receives an error while attempting to print a GPDS-delivered ticket, the ticket could be lost from the queue and not be retrievable for printing. This can occur because of printer issues or Galileo Print Manager.net configuration issues at the agency.
Note: If a ticket is lost, subsequent tickets sent by GPDS remain on the queue and are not lost.
GPDS does not store tickets after Galileo Print Manager.net retrieves them for printing. If printing fails, the queue becomes inhibited and the lost ticket cannot be retrieved for printing. The lost ticket must be resent to GPDS. This behavior works as designed. Storing and re-queueing of tickets could result in duplicate tickets, queue accumulation, and confusion.
Resolution: Ticket misprint and loss might occur because of printer issues or Galileo Print Manager.net misconfiguration. The agency should correct the printer issues or Galileo Print Manager.net settings, re-enable the queue, and then resend the ticket to GPDS.
-
Use PM Browser (an add-on application for Universal Desktop that the agency received during provisioning) to check for any indication of printing issues related to Galileo Print Manager.net or GPDS.
-
Check the printer for any issues, such as displayed errors or mechanical issues, and resolve them.
-
Verify that the Galileo Print Manager.net configuration is set up properly and make any necessary adjustments.
-
Re-enable the queue.
- Resend the ticket to GPDS.
If lost tickets still occur, contact Galileo Print Manager.net Technical Support for assistance.
Long Delay Before Galileo Print Manager.net Prints an Issued Document
If Galileo Print Manager.net is taking a long time to start printing, it might be due to a problem with Galileo Print Manager.net getting notifications from the GPDS Notify Proxy Gateway. In this situation, you can tell Galileo Print Manager.net to look for pending jobs itself by adding the AutoPollQueues parameter to the Host.config file and setting the value to at least 5 (seconds).
-
Using Windows Explorer, open the Galileo Print Manager.net application folder (typically, C:\Program Files (x86)\Galileo Print Manager .NET).
-
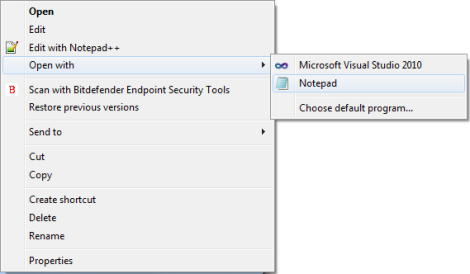
Right-click the Host.config file, and then select to open it with Windows Notepad (or similar text-editing software).
-
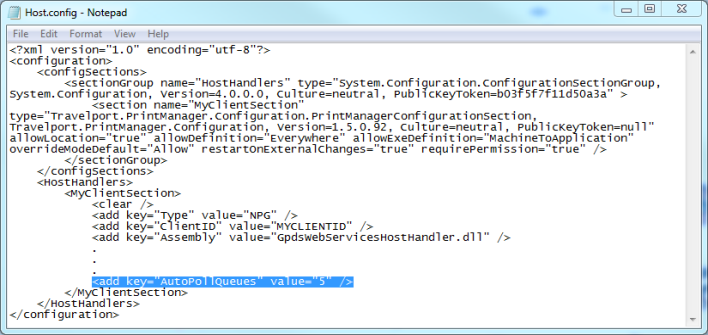
The following figure shows the XML code in the Host.config file.
-
Manually add the following line to the end of the list of parameters (as shown in the figure above):
<add key="AutoPollQueues" value="5" />
Note: The value in the above parameter is set to 5. This indicates five seconds. If needed, you can increase this value, but it is recommended that you do not decrease it.
-
On the File menu, click Save.
Note: If you are unable to save the Host.config file, see Unable to Save Manually Edited Configuration Files in the Galileo Print Manager.net Application Folder.
- Restart Galileo Print Manager.net.
- Right-click the GPM.NET Service Monitor icon in the Windows notification area.
- The following menu appears:
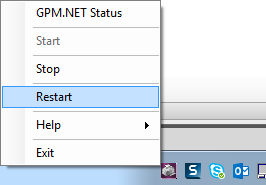
- Click Restart.
Connection to NPG (docnotify.galileo.com) Is Being Dropped by My Network
It is possible that your network environment keeps track of apparently idle connections and terminates any that have not seen data on them after a predetermined time. To address such a scenario, Galileo Print Manager.net will automatically re-register to the NPG server every 10 minutes. However, if this time is too long, it is possible to configure Galileo Print Manager.net to do this more frequently.
To set up Galileo Print Manager.net to automatically re-register to the Notify Gateway at a frequency you prefer, you can add the RegistrationRefreshIntervalMinutes parameter to the Host.config file and set the value to 1 or more minutes. Do this for each configured GPDS host.
- Using Windows Explorer, open the Galileo Print Manager.net application folder (typically, C:\Program Files (x86)\Galileo Print Manager .NET).
-
Right-click the Host.config file, and then select to open it with Windows Notepad (or similar text-editing software).
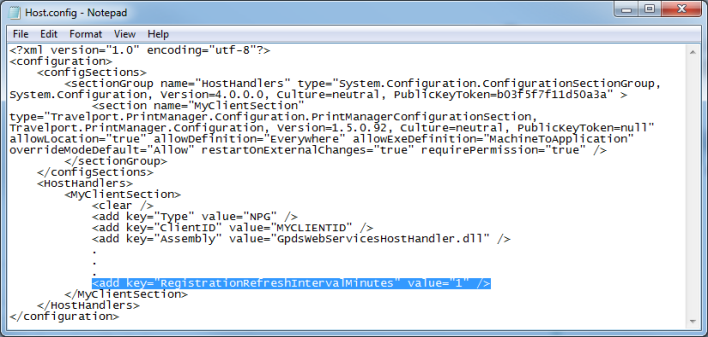
The following figure shows the XML code in the Host.config file.
-
Manually add the following line to the end of the list of parameters (as shown in the figure above):
<add key="RegistrationRefreshIntervalMinutes" value="1" />
-
On the File menu, click Save.
Note: If you are unable to save the Host.config file, see Unable to Save Manually Edited Configuration Files in the Galileo Print Manager.net Application Folder.
- Restart Galileo Print Manager.net.
Right-click the GPM.NET Service Monitor icon in the Windows notification area.
The following menu appears:
- Click Restart.
Connection to NPG (docnotify.galileo.com) Is Being Denied by My Network Because It Is Using Port 80 (HTTP)
If you are not receiving data (such as notifications) from the Galileo Print Delivery System (GPDS), it might be due to your network infrastructure not allowing non-HTTP traffic to be sent/received from an HTTP (port 80) endpoint. In this rare situation, you can change the proxy port setting used to connect to the Notify Proxy Gateway (NPG) to 443. Do this for each configured GPDS host.
Note: The NPG server docnotify.galileo.com only supports ports 80 and 443.
- Using Windows Explorer, open the Galileo Print Manager.net application folder (typically, C:\Program Files (x86)\Galileo Print Manager .NET).
-
Right-click the Host.config file, and then select to open it with Windows Notepad (or similar text-editing software).
The following figure shows the XML code in the Host.config file.

-
Manually add the following line to the end of the list of parameters (as shown in the figure above):
<add key="NotifyProxyServerPort" value="443" />
Note: The default setting for this parameter is 80. To return to the default setting, either change the value of this line to 80 or remove the line from the Host.config file.
-
On the File menu, click Save.
Note: If you are unable to save the Host.config file, see Unable to Save Manually Edited Configuration Files in the Galileo Print Manager.net Application Folder.
- Restart Galileo Print Manager.net.
Right-click the GPM.NET Service Monitor icon in the Windows notification area.
The following menu appears:
- Click Restart.
Error Occurs When Rail Device Status Is "Inhibited"
When a rail device's status is "Inhibited" because of a form code or printer issue, the GPM.NET Service Monitor issues an error, which appears in the GPM.NET Status area, as shown in the example below:

The Configured Devices area shows the "Inhibited" state of the device, as shown in the example below:

In this situation, Galileo Print Manager.net does not print the ticket. A corresponding error answerback for this ticket is sent to the GPDS. You can verify it on the GPDS website. For example:

You can click the status hyperlink for the configured device to view a detailed reason for the failure. For example:
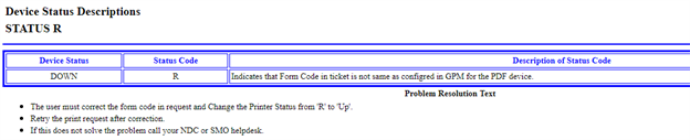
To enable Galileo Print Manager.net to pick up the ticket from the GPDS queue, bring up the failed device, which changes the device status from "R" to "UP". The device on the GPDS website will look similar to this:

Galileo Print Manager.net discovers that the GPDS queue is UP and changes the rail device's status to "Available".

If any tickets are sitting in the GPDS queue, Galileo Print Manager.net processes them without any restart required.